Disable Hyper V Windows
Determine whether the Hyper-V hypervisor is running
To determine whether the Hyper-V hypervisor is running, follow these steps:
-
In the search box, type msinfo32.exe.
-
Select System Information.
-
In the detail window, locate the following entry:
A hypervisor has been detected. Features required for Hyper-V will not be displayed.
Source 1 :
Disable Hyper-V From Windows Features
The Optional Features (a.k.a "Windows Features") tool allows you to add additional features that don't come preinstalled in Windows 11. Similarly, it can also help you disable those advanced features.
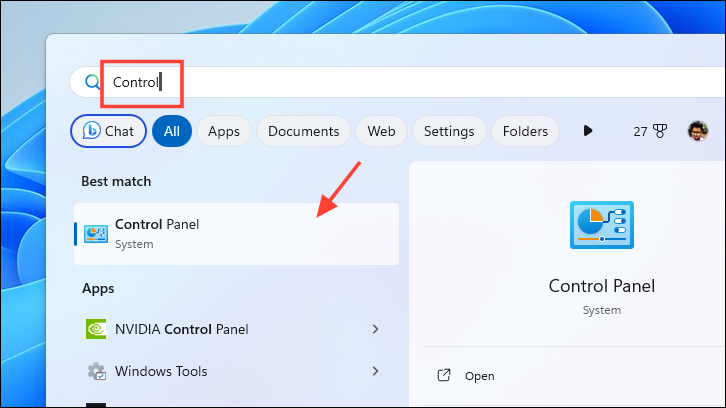
- Open the Start Menu and type 'Control Panel' in search box. Click on 'Control Panel' from the search results.
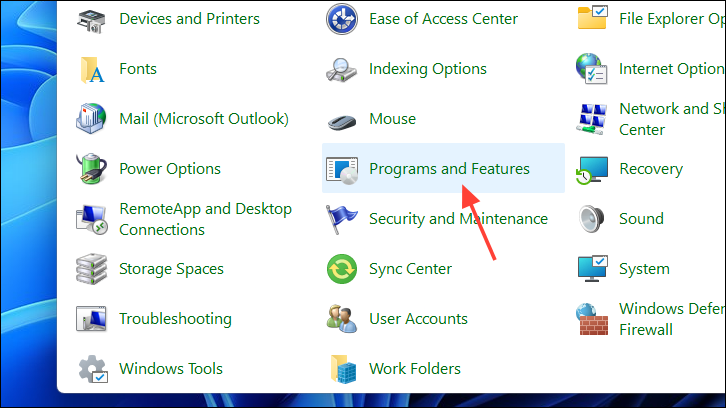
- Select the 'Programs & features' option on the Control Panel window.
- Click on 'Programs & features' from the right section of the window. If you have the 'Category' view of the Control Panel, select the 'Programs' option.
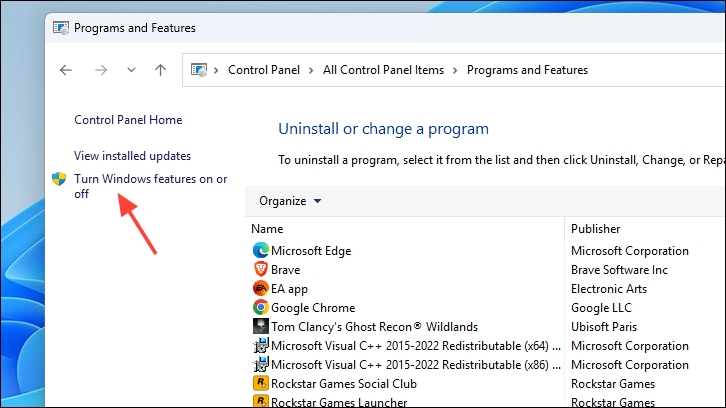
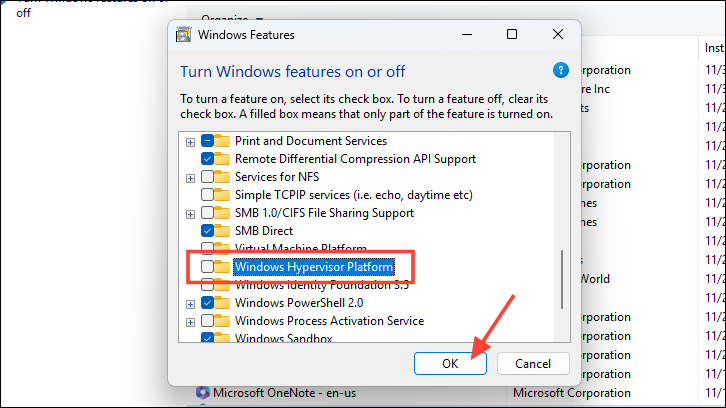
- On the subsequent screen, select 'Turn Windows features on or off'. A new window will open on your screen.
- On the opened window, locate and uncheck the 'Hyper-V' option.
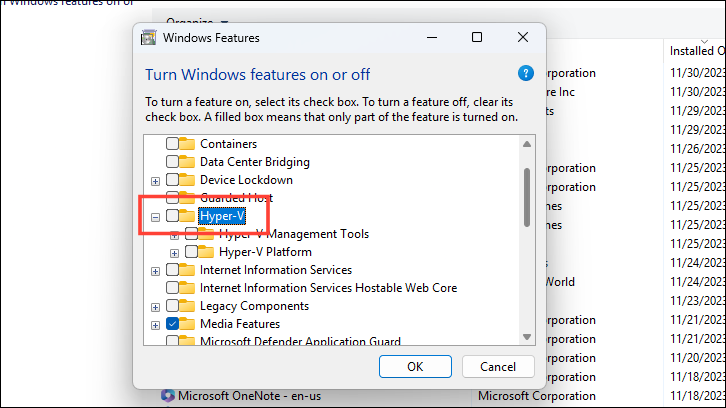
- Similarly, locate and uncheck the 'Virtual Machine Platform' and 'Windows Hypervisor Platform' and click 'OK' to save the changes.
- Restart your PC from the Start Menu to apply the changes.
Uninstall Hyper-V Using Windows Terminal
- Open the Start Menu and type 'Terminal'. From the search results, right-click on the 'Terminal' option and select 'Run as administrator'.
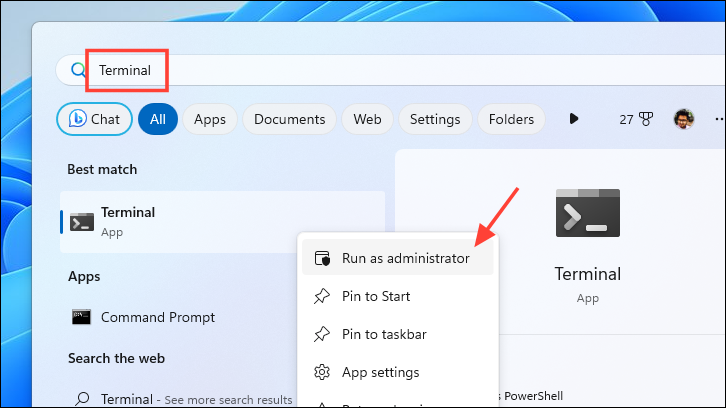
- A UAC (User Account Control) window will appear on your screen. Click on 'Yes' to proceed. If you are not logged in with an admin account, enter the credentials for one.
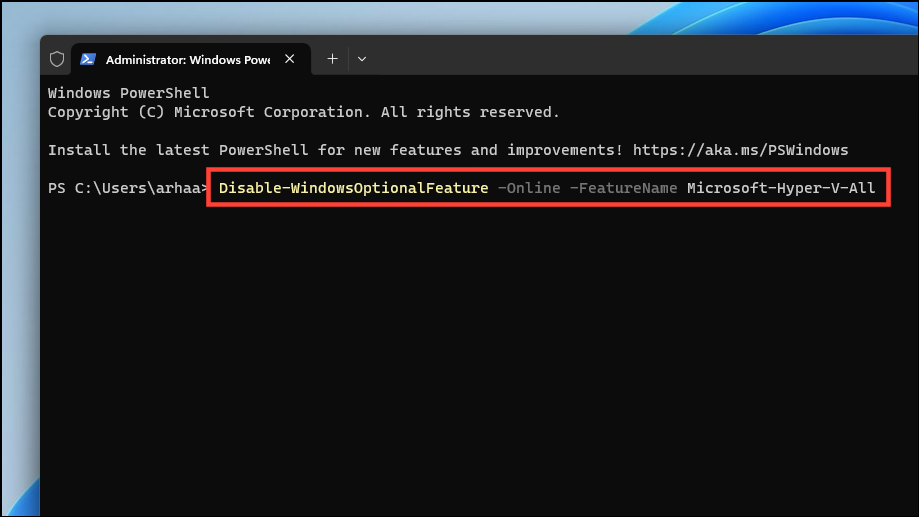
- You can perform the function with PowerShell and Command Prompt. To disable Hyper-V with PowerShell, type or copy and paste the below-mentioned command.
Disable-WindowsOptionalFeature -Online -FeatureName Microsoft-Hyper-V-All
- The process may take a few minutes to complete. Once completed, exit the Terminal and restart your PC to let the changes take effect.
Disable Hyper-V Using Command Prompt:
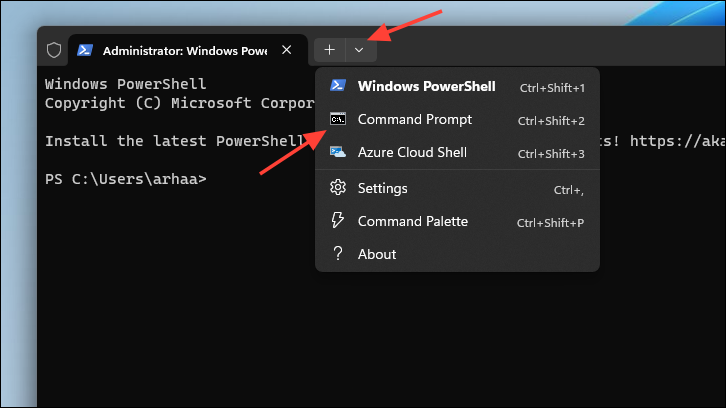
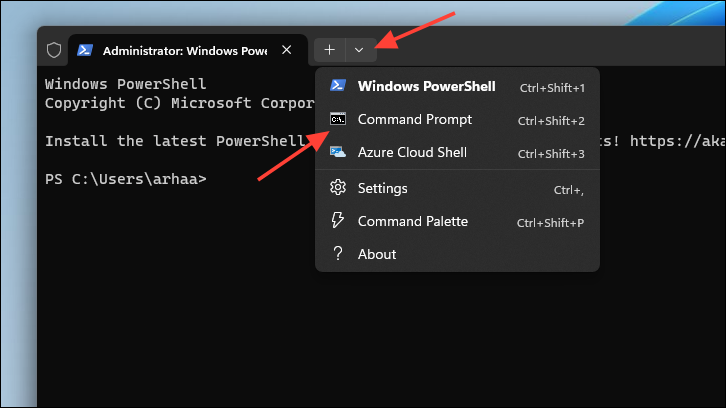
- On the Terminal window, click on the chevron (downward arrow) and select the 'Command Prompt' option.
- Type or copy and paste the below-mentioned command and hit
Enterto execute it.
dism /online /disable-feature /featurename:Microsoft-hyper-v-all
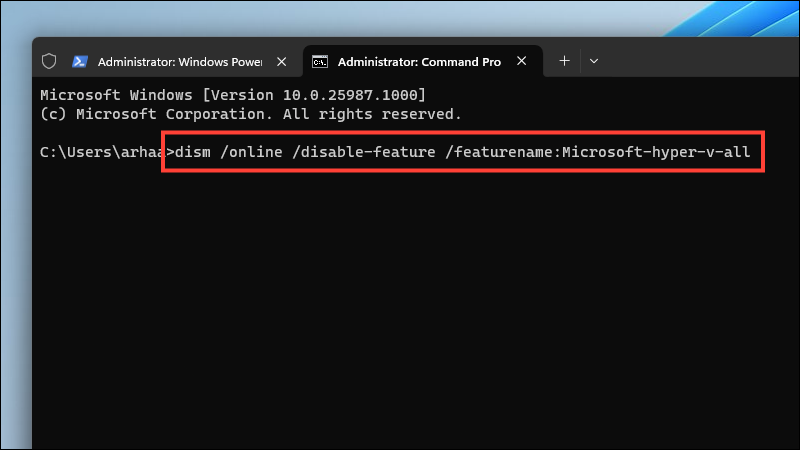
- Once executed, the Command Prompt will show a 'completed successfully' message.
- Exit the Windows Terminal and restart your PC to apply the changes.
Disable Hyper-V Using BCDEdit Tool
BCDEdit (Boot Configuration Data Edit) is a command-line tool that allows you to disable Hyper-V. This method can come in handy when do not wish to uninstall Hyper-V completely from your computer.
- Open the Start Menu and search for 'Windows Terminal'. From the results, right-click on 'Windows Terminal' and select 'Run as administrator'.
- On the Terminal window, click on the chevron (downward arrow) and select 'Command Prompt'.
- Type or copy and paste the below-mentioned command and hit
Enterto execute.
bcdedit /set hypervisorlaunchtype off
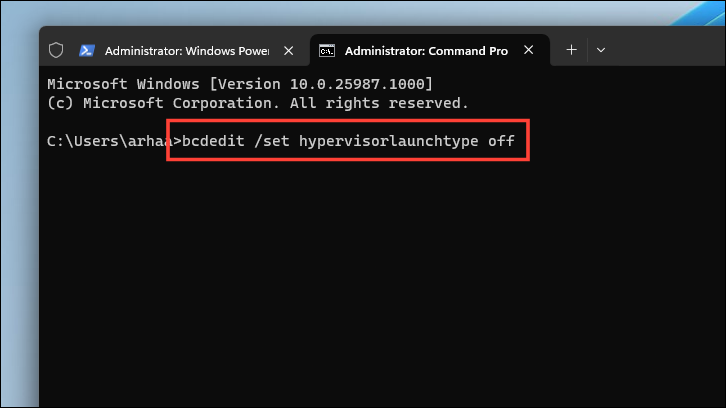
- Once Hyper-V is disabled, the Command Prompt will display the success message. Exit the Terminal and restart your PC to let the changes take effect.
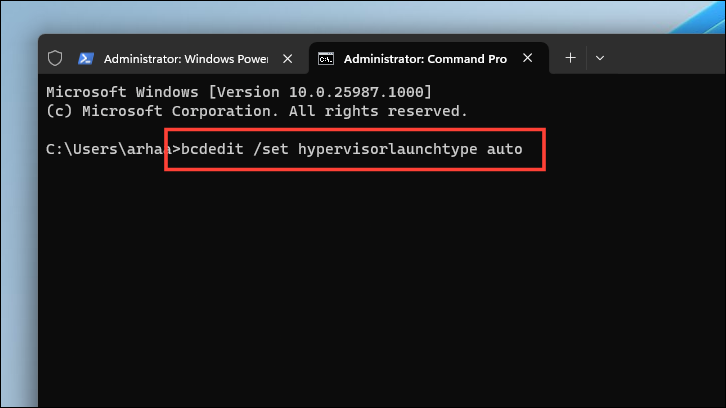
- If you wish to re-enable the Hyper-V on your computer, type or copy and paste the below-mentioned command in an elevated Command Prompt window.
bcdedit /set hypervisorlaunchtype auto
Disable Memory Integrity Using Windows Security
Many times, users encounter 'Hyper-V' detected issues even after uninstalling Hyper-V from their computer. To address this issue, simply disable Memory Integrity from Windows Security.
The issue typically arises when you are trying to install third-party virtualization tools. Since the 'Memory Integrity' feature is designed to restrict access to programs at the kernel level, when enabled, it will not grant any third-party tool access to the system's virtualization hardware.
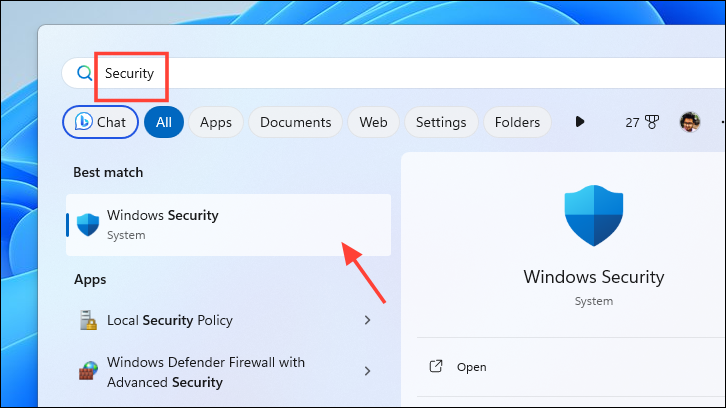
- Open the Start Menu and type 'Security'. From the search results, click on the 'Windows Security' option.
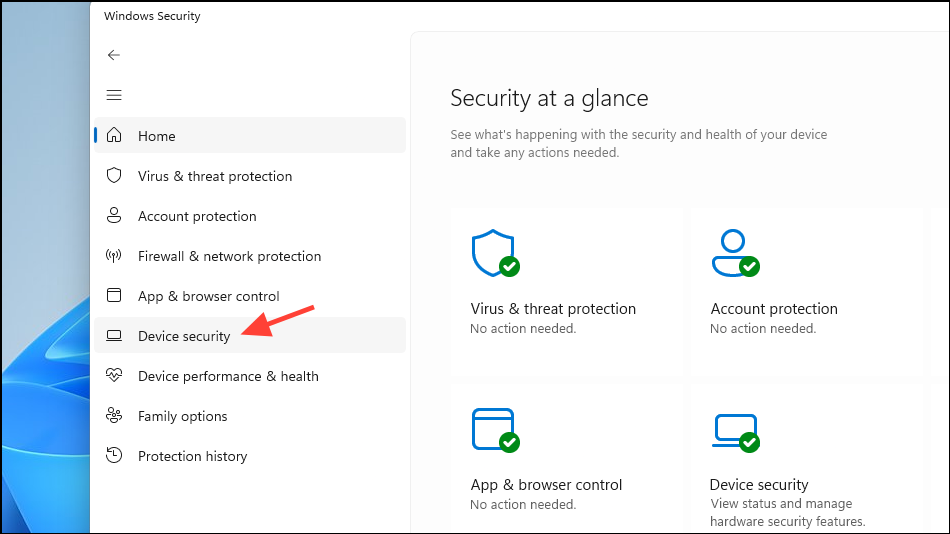
- On the Windows Security window, click on the 'Device Security' option from the left sidebar.
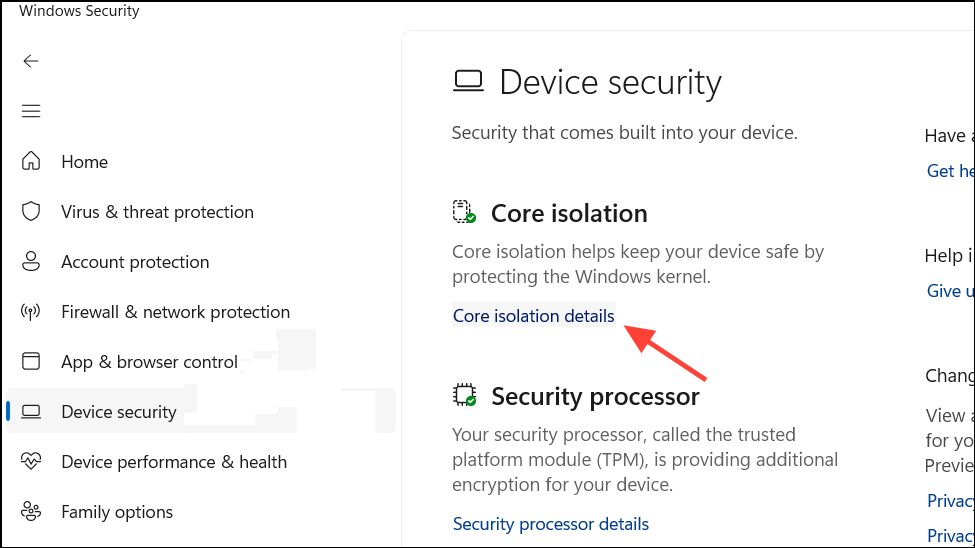
- On the subsequent screen, click on the 'Core isolation details' option.
- Finally, turn off the toggle for the 'Memory Integrity' option.
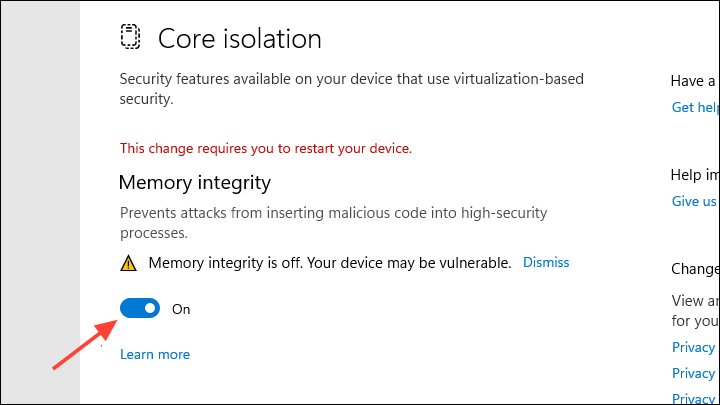
- Restart your PC to let the changes take effect. Once Memory Integrity is disabled, you should be able to install third-party virtualization tools.
Uninstall Hyper-V Virtual Adapter
Not all, but some users also encountered the alert message 'We couldn't complete the updates, undoing changes', after they uninstall Hyper-V from their computer. This issue could arise due to the virtual network adapters that were not deleted during the uninstallation of Hyper-V.
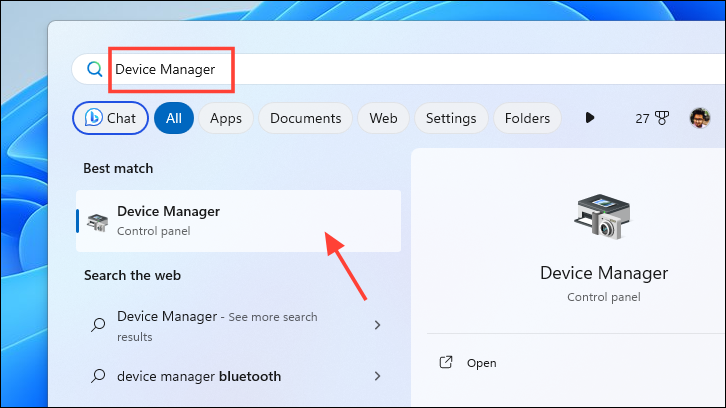
- Open the Start Menu and search for 'Device Manager'. From the search results, click on the 'Device Manager' option.
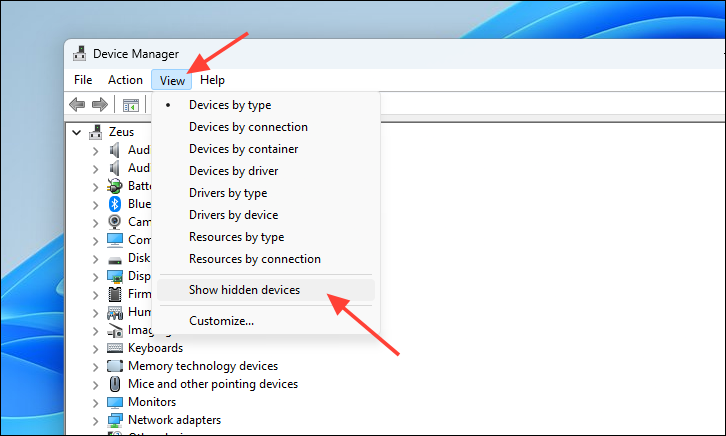
- Click on the 'View' tab and select 'Show hidden devices' on the Device Manager window.
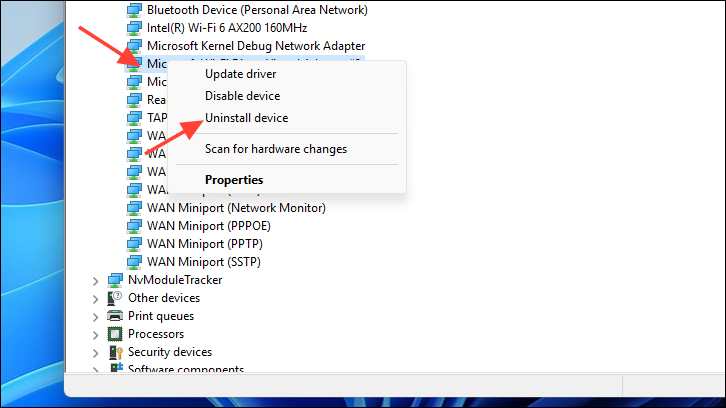
- Expand the 'Network Adapters' section. Next, right-click on the 'Hyper-V Virtual Ethernet Adapter' and select the 'Uninstall device' option.
*Note:* Do not accidentally uninstall the 'Microsoft Wi-Fi Direct Virtual Adapter' as it facilitates the Wi-Fi Direct functionality on the computer.
- If there is more than one virtual adapter installed, delete all of them by repeating the steps above.
- Once all adapters have been deleted, exit the Device Manager and restart your PC.
Disable Device Gaurd and Credential Gaurd
Users typically working with VMware Workstation encounter an issue saying 'Device Gaurd/Credential Gaurd' is enabled when trying to power on the VMware Workstation. That being said, you can easily disable it using the Registry Editor.
Device Gaurd hardens your system and prevents malicious code from running on it. A Credential Device is another feature that isolates system and user secrets against a system compromise.
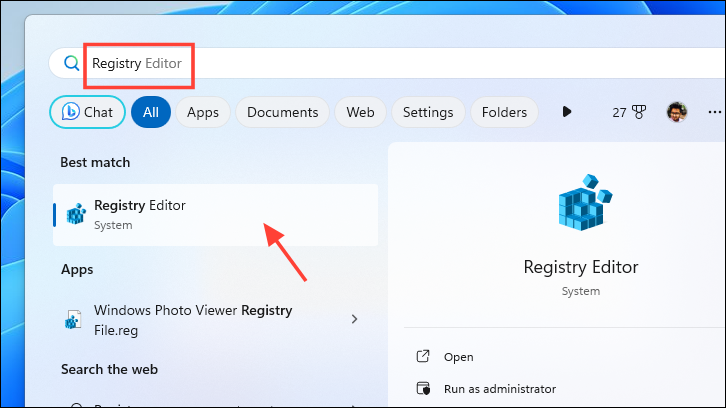
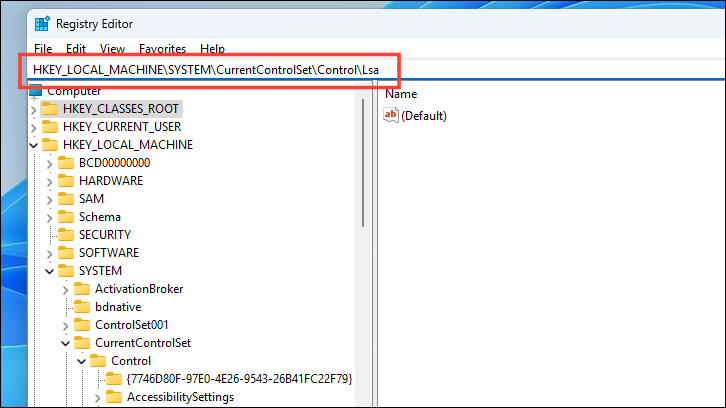
- Open the Start Menu and search for 'Registry'. From the search results, click on the 'Registry Editor'.
- Type or copy and paste the below-mentioned address in the address bar and hit
Enterto navigate to it.
HKEY_LOCAL_MACHINE\SYSTEM\CurrentControlSet\Control\Lsa
- On the right section of the window, double-click on the 'LsaCfgFlags'. This will open its properties.
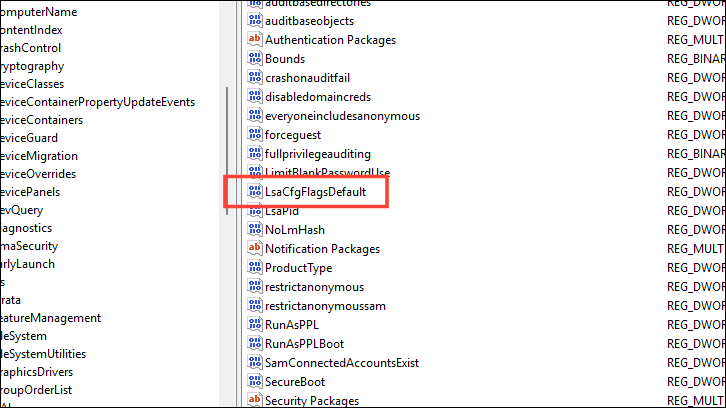
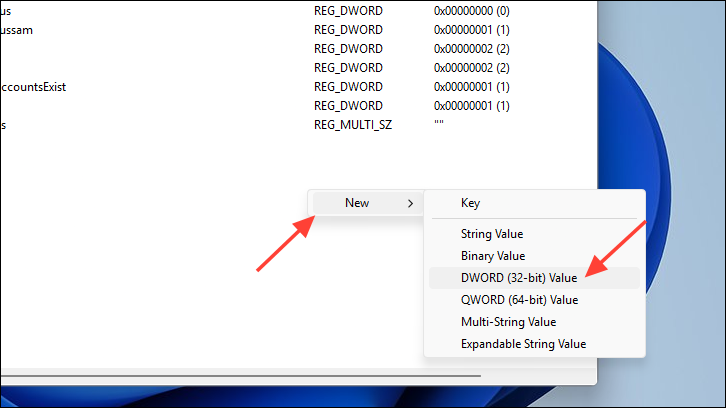
- If no such DWORD file exists, right-click on the empty space and hover over the 'New' option. Then, select the 'DWORD' option. Finally, rename the file to 'LsaCfgFlags'.
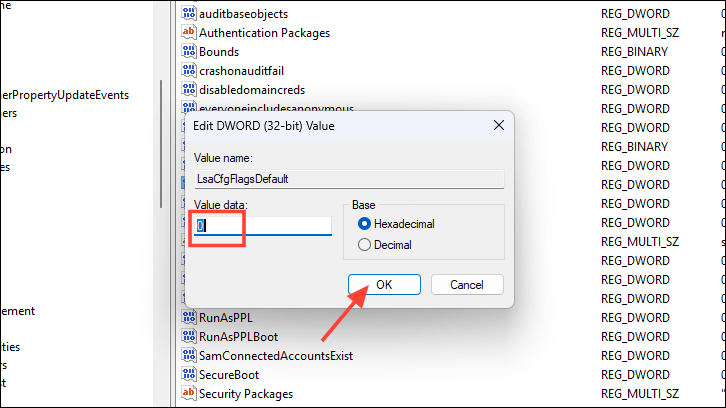
- On the 'LsaCfgFlags' properties window, enter
0in the 'Value data' field.
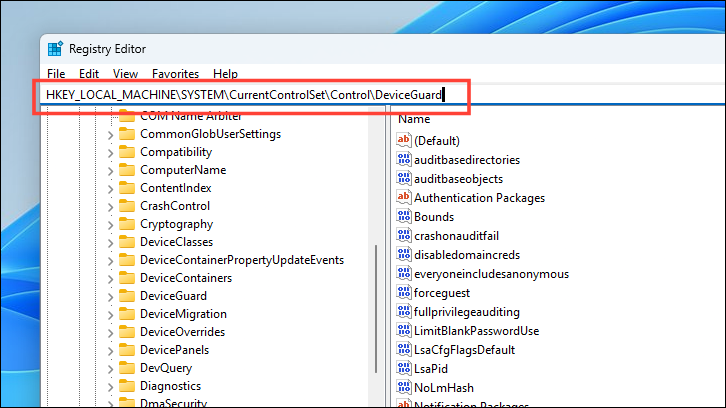
- Type or copy and paste the below-mentioned address in the address bar and press
Enterto navigate to it.
HKEY_LOCAL_MACHINE\SYSTEM\CurrentControlSet\Control\DeviceGuard
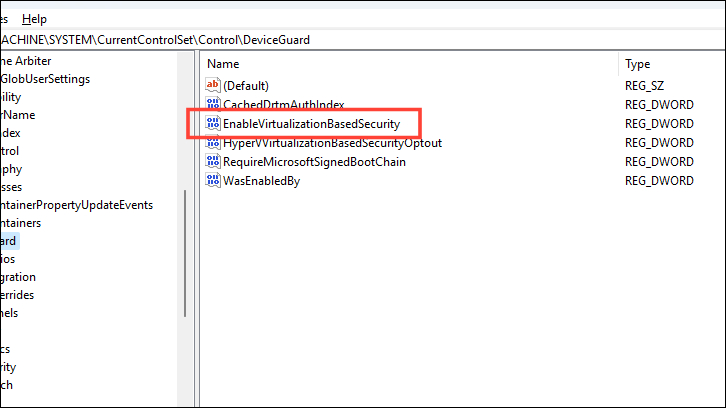
- On the right section of the window, double-click on the 'EnableVirtualizationBasedSecurity' to open its properties.
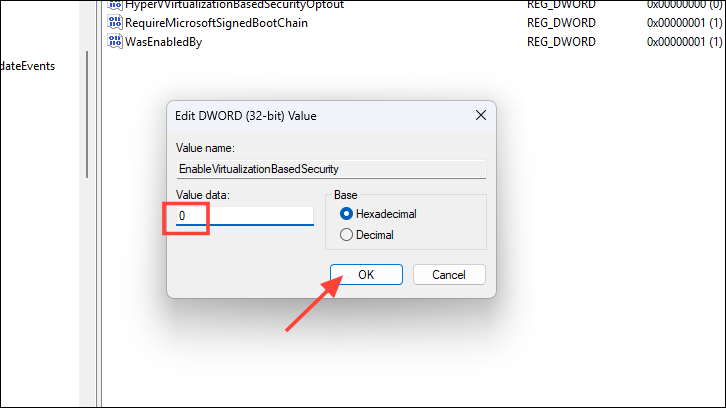
- Type
0in the 'Value Data' field and click 'OK' to save the changes.
- Restart your computer to apply the changes. You should no longer experience the 'Device Gaurd and Credential Gaurd is enabled' issue on your computer. If you wish to enable them in the future, just change the value to
1in the Registry Editor following the same steps mentioned above.
Source 2 :
How to Disable Hyper-V
Below, we’ll explain how to remove Hyper-V using Windows Features, BCDEdit, command line, and PowerShell. Keep in mind that once removed, you’ll be unable to access Hyper-V Manager or change any VM settings until you reinstall it.
1. How to Disable Hyper-V Using Windows Optional Features
The easiest way to disable Hyper-V is by using the Windows Features app. To do so:
- Press Win + R to open Run.
- Type control and press Enter to open the Control Panel.

- Select Programs.

- Choose Programs and Features.

- Select Turn Windows features on or off in the left-hand menu.
- Scroll down and uncheck the checkbox next to Hyper-V, Windows Hypervisor Platform, and Virtual Machine Platform.

- Reboot your PC.
Note: This method will completely uninstall Hyper-V, meaning that if you want to use it in the future, you’ll have to reinstall it. We’ll explain how to do so below.
2. How to Disable Hyper-V Using BCDEDIT
The BCDEDIT tool lets you disable Hyper-V in your PC’s boot configuration rather than uninstalling it entirely. This is useful if you want to avoid having to install Hyper-V again in the future.
To disable Hyper-V using BCDEDIT:
- Open the Start Menu and search for “cmd.”
- Right-click Command Prompt and press Run as Administrator.

- In the Command Prompt window, enter the following command:
bcdedit /set hypervisorlaunchtype off

- You should receive a message saying that the command was successful. When you do, restart your PC to ensure that Hyper-V is disabled.
If you ever need to re-enable Hyper-V, type the following command into Command Prompt as above:
bcdedit /set hypervisorlaunchtype auto
Then restart your PC to confirm the changes.
3. How to Disable Hyper-V Using Command Prompt
If you’re unable to use the Windows Features tool to disable Hyper-V, you can uninstall it using Command Prompt. To do so:
- Open the Start Menu and search for “cmd.”
- Right-click Command Prompt and press Run as Administrator.
- Type the following command and press Enter:
dism /online /disable-feature /featurename:Microsoft-hyper-v-all
- You should receive a completion message stating that the DISM tool has disabled Hyper-V.

- Restart your PC.
4. How to Disable Hyper-V Using Windows PowerShell
One final method to disable Hyper-V is by using PowerShell in admin mode. To do so:
- Open the Start Menu and type “PowerShell.”
- Right-click PowerShell and select Run as administrator.

- Enter the following command and press Enter:
Disable-WindowsOptionalFeature -Online -FeatureName Microsoft-Hyper-V-All

- Wait for a success message, then restart your PC to confirm the changes.
How to Fix “We Couldn’t Complete the Updates” Error
While uninstalling Hyper-V, many users encounter an error message that states, “We couldn’t complete the updates, undoing changes.” This error prevents you from uninstalling Hyper-V and means that the original error is still going to occur.
To fix this, you need to remove the Hyper-V Virtual Network Adapter:
- Open the Run dialog box.
- Type devmgmt.msc and press Enter.

- In the Device Manager, double-click Network Adapters to expand the section.

- Locate Hyper-V network adapters. Select the View menu option at the top of the window, and select Show hidden devices.
- Right-click Hyper-V Virtual Ethernet Adapter and select Uninstall Device.
- Repeat this for every network adapter in the list. Then, reboot your PC and check if it worked on startup.
Still Having Problems With Hyper-V? Try These Fixes
Unfortunately, you may still have issues with games and other virtualization software after removing Hyper-V. This is due to a few similar Windows features that cause conflicts with third-party virtualization tools.
Here are two things to try:
1. Turn Off Memory Integrity
The memory integrity feature, found in Windows Security, helps prevent malware from infecting the most important system processes. However, it also stops certain third-party tools from being able to access key resources they need to function.
To turn off memory integrity:
- Press the Windows key + I to open Settings.
- Select Privacy & security.

- Choose Windows Security and select Device security.
- Select Core isolation details.

- Toggle off Memory integrity and restart your computer.

2. Disable Device Guard and Credential Guard
Device Guard and Credential Guard are two Windows features that require Hyper-V to function. Due to this, there may be a group policy function or BIOS/UEFI settings that automatically enable Hyper-V whenever you boot up your PC.
To fix this, you need to alter the Windows registry. Modifying the registry can be risky, so we recommend creating a system restore point before performing the next steps.
Here’s how to disable Device Guard and Credential Guard:
- Press Win + R to open Run.
- Type Regedit and press Enter.

- Navigate to Computer\HKEY_LOCAL_MACHINE\SYSTEM\CurrentControlSet\Control\Lsa. You can simply copy and paste that location into the address bar at the top of the Registry Editor window.
- Select the Lsa folder.

- In the right-hand window pane, locate LsaCfgFlags. If it doesn’t exist, right-click in the window, select New > DWORD (32-bit) Value, and name it “LsaC gFlags.”
- Double-click the LsaCfgFlags DWORD and change the Value data field to 0.

- Select OK.
- Now, navigate to Computer\HKEY_LOCAL_MACHINE\SYSTEM\CurrentControlSet\Control\DeviceGuard.
- Locate the EnableVirtualizationBasedSecurity DWORD value. If it doesn’t exist, create it as above.

- Double-click the DWORD and set its value to 0.
- Select OK, then restart your computer to make sure the changes are applied.
Note: If you ever need to re-enable Device Guard or Credential Guard, repeat the steps above but set the value to 1.
Source 3 :
Phase 3:
There is a manual way to do this, and I found the instructions, but they're a bit scary. It involves using bcdedit to modify the boot configuration to apply a configuration change that sets a "DISABLE-LSA-ISO" option. Lots of opportunity for something to go wrong if the instructions I found are flawed, or if a mistake is made (typo, missed a command). So, I'm strongly recommending (and providing instructions for) the method that uses the Microsoft-provided script. I've tested it, it worked for me, and the same script provides a way to undo the whole thing later if desired, too. Power users are welcome to find the instructions I found on their own, or to simply open the script file and examine what it does for any manual implementation activities.
- Go to Download Device Guard and Credential Guard hardware readiness tool, provided by Microsoft to check Device Guard and Credential Guard capability, and to turn on/off the features. There's no setting anywhere in Settings app or control panel for this, and this "tool" is actually a PowerShell script, but it provides the necessary functionality. Find the Download button and click it, and your browser will download a ZIP archive.
- Find and extract the folder contained in the archive. Don't try to run the script from within the archive. If you're using Windows Explorer, it can make a ZIP archive look like just another folder, but it isn't. You need to drag out the "dgreadiness_v3.6" (version as of when I wrote this post) folder from the archive into a real folder, e.g. onto your Desktop.
- Search for "powershell" in Start menu to find Windows PowerShell, right-click it, and run as administrator (elevated). You must run it elevated or the script won't work.
- You need to change the current drive and directory to the one where the script is. If you're not command prompt savvy: type "C:" for example (no quotes) if the folder is on the C: drive, or "D:" if it's on the drive, etc., and hit Enter, which should change the active drive to the correct one; next, open the folder you extracted the script files into, copy the address from the address bar into the clipboard (highlight and Ctrl-C), then type the following command (replacing PATH with a Ctrl-V to paste the path you just copied), and hit Enter:
cd "PATH" - The prompt in front of your blinking cursor should now match the folder where the script file is located, meaning your "current directory" is the correct one.
- Unless you know that you've already set this policy (power user), run this command next, to allow the script to be run:
Set-ExecutionPolicy Unrestricted - You'll have to respond to a security prompt by typing "y" (if I remember correctly), possibly followed by Enter. It should then say it has successfully changed the execution policy.
- Now we can run the script. Type/paste (if the version number has changed since I posted this, adjust according to the filename of the .ps1 script file in the extracted folder):
DG_Readiness_Tool_v3.6.ps1 -Disable - The script will do some stuff, and then you'll get to restart, and during restart you will get a full-screen prompt asking you to confirm you want to opt out of Device Guard and Credential Guard. Answer in the affirmative. I don't have precise instructions for the exact sequence of events and prompts/actions after running the script, because I ran it several days ago and didn't document what I saw.
- Once Windows has restarted with these features "opted out of," fire up System Information and check that VBS value again. For me, this was the final step that did the job, and when I ran a VMWare Workstation VM, it gave me the coveted Monitor Mode value of "CPL0"!
- By the way, for the sake of security, you might want to change the PowerShell script execution policy back to the more restrictive default one after these steps. If so, launch Windows PowerShell again, as administrator, and execute:
Set-ExecutionPolicy Default
Trouble Shooting :
If you don't have : Hyper-V on Windows Features ?
Step 1: Create a text document and rename it as "Hyper-V.txt"
Step 2: Enter the following code into the document:
pushd "%~dp0"
dir /b %SystemRoot%\servicing\Packages\*Hyper-V*.mum >hyper-v.txt
for /f %%i in ('findstr /i . hyper-v.txt 2^>nul') do dism /online /norestart /add-package:"%SystemRoot%\servicing\Packages\%%i"
del hyper-v.txt
Dism /online /enable-feature /featurename:Microsoft-Hyper-V-All /LimitAccess /ALL
Step 3: After saving the document, rename the .txt to .cmd, so the file should be "Hyper-V.cmd" now
Step 4: Right-click the document and execute the file as administrator. A command window will appear. After the installation is complete, enter Y to restart the computer
You should now have the Hyper-V option in "Turn Windows features on or off" menu.
If you don't have : gpedit.msc on Windows 11 ?
Step 1: Create a text document and rename it as "active-gpedit.txt"
Step 2: Enter the following code into the document:
pushd "%~dp0"
dir /b %SystemRoot%\servicing\Packages\*Hyper-V*.mum >hyper-v.txt
for /f %%i in ('findstr /i . hyper-v.txt 2^>nul') do dism /online /norestart /add-package:"%SystemRoot%\servicing\Packages\%%i"
del hyper-v.txt
Dism /online /enable-feature /featurename:Microsoft-Hyper-V-All /LimitAccess /ALL
Step 3: After saving the document, rename the .txt to .cmd, so the file should be "active-gpedit.cmd" now
Step 4: Right-click the document and execute the file as administrator. A command window will appear. After the installation is complete, enter Y to restart the computer
@echo off
pushd "%~dp0"

dir /b %SystemRoot%\servicing\Packages\Microsoft-Windows-GroupPolicy-ClientExtensions-Package~3*.mum >List.txt
dir /b %SystemRoot%\servicing\Packages\Microsoft-Windows-GroupPolicy-ClientTools-Package~3*.mum >>List.txt

for /f %%i in ('findstr /i . List.txt 2^>nul') do dism /online /norestart /add-package:"%SystemRoot%\servicing\Packages\%%i"
pause
You should now have the Local Group Policy Editor on our Windows 11.
Some scripts :
hyper-v-install.cmd:
bcdedit /set hypervisorlaunchtype auto
DISM /Online /Enable-Feature /All /FeatureName:Microsoft-Hyper-V
DISM /Online /Enable-Feature /All /FeatureName:VirtualMachinePlatform
DISM /Online /Enable-Feature /All /FeatureName:Microsoft-Windows-Subsystem-Linux
shutdown /r /t 5
hyper-v-uninstall.cmd:
bcdedit /set hypervisorlaunchtype off
DISM /Online /Disable-Feature /FeatureName:Microsoft-Hyper-V-All
DISM /Online /Disable-Feature /FeatureName:VirtualMachinePlatform
DISM /Online /Disable-Feature /FeatureName:Microsoft-Windows-Subsystem-Linux
shutdown /r /t 5